Winter F.A.Q
General Stuff
What is sidecut/sidecut radius and how do I make sense of it?
(Note: Though the information that follows is most useful for alpine/tele/snowboard selection, it provides a good base level of information for nordic skiers as well.)
The Straight Dope on Sidecut
Sidecut is that elegant arc that creates the edge of a ski or snowboard. A ski without any sidecut is completely straight; a ski with lots of sidecut flaunts the ubiquitous hourglass figure. Before we settle any other definitions, let’s examine the information that is commonly presented with skis and snowboards as a reference. Manufacturers typically display the following parameters somewhere on their product, be it upon a visible sticker or etched in permanent print on the topsheet. We’ll use a specific alpine ski as our example:
Dimensions: 127-76-114
Sidecut: 22mm
Radius: 11m at 162cm
Dimensions: These represent the width of the ski at the widest points of the tip, waist (or middle) and tail. The exact details of measurement may vary with manufacturer slighty with manufacturer. From the dimensions above, we know that the Metron M:11 has a width of 76mm at the waist.
Sidecut: Technically this is the difference between an average of the tip and tail measurements and the waist of the ski or snowboard, divided by two. Practically speaking, if you placed the ski sideways against a wall so that the edges at the tip and tail were touching the flat surface, the sidecut would turn out to be the distance from the waist edge of the ski to that wall. Instead of listing the sidecut as a single number, like 22mm, some companies use the terms sidecut and dimensions interchangeably. Sidecut tells you how much arc or shape your skis possess.
Turn Radius: If you think of the sidecut as an arc, imagine that this arc describes part of a gigantic circle, one that you could draw in chalk on pavement if you traced the curving edge of your ski and extended beyond it. The turn radius (sometimes called sidecut radius as well) of a ski or snowboard is defined by this imaginery circle, always expressed in meters. Though the dimensions of a ski remain fairly constant throughout the differing lengths it is offered in, the turn radius increases with length. Imagine that as the distance from tip to tail increases, that visible arc simply gets longer. This increases the size of the imaginary circle which consequently lengthens the radius, and is the reason that a turn radius is refered to only with a specific length
How do I use the various ski characteristics (sidecut, flex, length) to make a descision about skis?
Now that you know what the terminology means (see previous question), let’s examine how you can use it to deconstruct the soul of a given ski.
Waist Width: This is typically the dimension used to define the application of a ski.
- ~72mm and below. Carvers. On skis with narrow widths, the transition from one edge to the other takes less time to complete. If transitions are faster, then you spend more time on your edges and the skis will hold better on harder snow without washing out and skidding inappropriately. Boards in this category are often called Carving Skis and are the most fun on groomed trails. Think of all those times when you’ve started turning on a bare spot (where the snow has been scraped away to reveal an ice-like layer) and had to bail and just go straight; the right Carvers can usually bite into this stuff with confidence.
- 74mm to 88mm. Mid-Fat. We consider these widths to be All-Mountain or Mid-Fat in the East, and as the names suggest, are found on skis that can tackle the terrain on the entire mountain. What you get is a wider platform that affords more stability and float in natural snow. Natural snow can be anything from untracked powder to thick spring mush, and narrower skis will cause you to fall more often in these unpredictable conditions. Par example, a ski that is 78mm at the waist will provide good edgehold on the groomers – just not as good as a 67er (assuming both have the same construction & flex) – but it will also make glade runs or backcountry forays all the more enjoyable.
- 88mm – 100mm. Fat. These skis are definitely portly, gluttonous powder indulgers. They fit snugly into the Fat category. They make short work of powder but wash out more easily on hardpack, unable to cut sharp ribbons as preciscely as the Carvers, though most still ski suprisingly well on groomed snow. Perfect for the backcountry and able to handle just about anything mother nature can dump, thaw and refreeze. Great for someone does more off-trail skiing than on and avoids the race course.
- 100mm – 130mm+. Super-Fat. Only powder skiers need apply. We don’t stock skis of this width at Omer and Bob’s because few people would ever buy them for local (Upper Valley) usage. They usually possess minimal sidecut, soft flexes and the flotation of a thousand life preservers. A powder diet proportional to their width is required to sustain them. If you like to put in the extra work to find the deep, untracked stuff, and you ski the Northern Green mountains or the Whites (and you already own three other pairs of skis), these could be for you.
Sidecut / Turn-Radius: There is no perfect amount of sidecut for each level of skier; it’s all based on personal preference.
- Short-Radius (10 to 14 meters). They allow beginners and intermediates the ability to carve turns at lower speeds and on slopes with more moderate angles. Experts will enjoy ripping tight, ultra-quick turns on any terrain. Often refered to as a Slalom sidecut, because Slalom races feature tightly spaced gates and favor quick-turning boards. The more advanced slalom-cut skis definately require strength and technique to handle because, by design, they constantly yearn to turn. Note that many of the shorter, women’s specific skis have turn radii in this range: since turn radius is a function of ski length, a tighter radius is the natural result.
- Medium-Radius (about 14 to 16 meters). Here you have skis that can be brought around in tighter turns or longer radius arcs, depending on your speed and edge pressure. Makes a variety of turn shapes.
- Long-Radius (17 meters and above). These skis hold an edge better during longer radius, high speed turns. They will generally be more stable and track straighter at higher speeds because of the relatively smaller shovel and tail widths. Long-radius skis are better in moguls because the aggressive sidecut doesn’t catch (and most of the turns are in the air). Less sidecut is generally better in powder as well, because a ski with a more uniform surface area will float better. Called a Giant Slalom or GS sidecut because of the penchant for long, sweeping turns.
Longitudinal Flex:
- Softer. A softer-flexing ski takes less effort to pressure into a turn. Skis designed for less advanced skiers are softer for easy turning at low speeds and without precise technqiue. But softer skis are also the best in powder, because the soft flex keeps the ski above the snow rather than plunging it beneath. Also, it is the soft flex of a ski that allows it to be flexed into a turn in powder, not the sidecut–sidecut only swings your skis into a turn when it is pressed against a firm base. High speeds and hard turns are their weakness; the skis will wash out more easily on hardpack and feel chattery and unstable while straight-lining.
- Stiffer. Provides the most edge-holding power, but requires the most energy from a skier to control. Advanced skis usually have more metal laminate in the body to provide this stiffness. The stiffer the ski, the more power and technqiue are necessary. You’ll be able to attack steeper slopes with the confidence that your skis will hold the turns. Skis with stiff flexes are not the best choice for powder because they tend to submarine, and stiffer skis are heavier, which means more work in the backcountry.
Length: As far as length goes, there could be two or even three different lengths in a specific model suited to certain uses and ability levels at the same skier weight. Manufacturers provide us with suggested weight ranges for each ski model. Generally speaking, the ski tips should hit you somewhere in the face, but this will be modified by how and where you intend to ski, as well as by the characteristics of your skis.
- Shorter. In the same ski model, the shorter skis have softer flexes. This means that they require less effort and technique to put on edge, a trait that makes them friendlier to beginners. A shorter ski also has a tighter turning radius. If you ski gladed runs (where short turns are necessary to avoid eating bark) or just like making quick carves, shorter skis are probably for you. For most skiing in the New England backcountry on its narrow, winding trails, shorter skis make the most sense.
- Longer. In contrast, a longer ski of the same model has a stiffer flex, which translates to better edgehold and vibration damping (absorbtion) at higher speeds. Longer skis float better in powder as well because of their increased running surface. Their stiffer flex means a skier has to put more muscle and up-and-down movement into each carve, however, so make sure you’re up to the task. Longer turn radii make them great for sweeping GS turns.
Though you can easily isolate several attributes of a single ski model and disscet them under a microscope, remember that ski construction is like mixing cocktails. All the individual properties blend together to form something unique. This is where the fine fellows at Omer and Bob’s can help you. We’ve collectively demoed hundreds of skis, so come on in and take advantage of our knowledge and experience.
What’s the difference between sintered and extruded bases?
Ski and snowboard bases are made out of a polyethylene (a plastic polymer) material that everybody calls P-Tex for short, though it is actually the trademarked name for only one particular company’s polyethylene recipe. Since all facial tissues are referred to as Kleenex by the same token, no feelings are hurt and no lawsuits flung. The properties of a base are determined by its particular manufacturing process, of which there are two.
Extruded bases are made by rapidly heating up the P-Tex to a high temperature and then forcing it through a slot to create sheets of the desired thickness which are pressed together to form the base. It is a faster and easier process, so extruded bases are often found on entry-level or more recreational downhill products. Bases of this type are not very wax-absorbent at all (nor are sheets of plastic) but they are inexpensive and easy to produce. Extruded bases (especially on snowboards) are more likely to exhibit warpage (being convex or concave) which can negatively affect the ride. Many nordic touring skis (ones with “fish scales”) and less expensive snowboards use extruded bases to hit a lower pricepoint.
A sintered base is formulated by compressing polyethylene pellets under low pressure over a long period of time, causing them to fuse together. This process, unlike extrusion, creates a base with microscopic open spaces between the polyethylene molocules into which wax can penetrate and reside. These bases are faster as a result, provided they are regularly given a healthy dose of glide wax, as well as being lighter and stronger than extruded counterparts. Almost all nordic waxable and skate skis today use sintered bases because excess friction is a much bigger and uglier monster on flat ground. Performance alpine, telemark and snowboard products also use sintered bases. They are always flatter than their extruded counterparts.
What is “mondo point” sizing? What boots come in European sizes?
Ah, the lack of standardization in standardization. This is why, when you look at the side of a boot box (or any shoes that are marketed internationally), you’ll see three or four different size measurements that basically express the same virtual size nobody can quite agree on exactly. But what is the reason for this, you ask? Apparently our present-day sizing methodology dates back to 1324 and involves a sticky situation with King Richard II, a group of rankled tradesmen and the number of barleycorns in an inch.
UK: 10.5 US: 11 Mondo: 29.0 EUR: 45
Basically what these printed numbers tell you is that you have to try the boots on, unless you trust in a antiquated scheme based solely on the length of some temperate grain.
Alpine, and telemark boots are fitted through the Mondopoint system, where the size represents the length of the foot in centimeters. Go metric. Thus, if you grab a box printed with 29.0, you’d better have feet that measure around 29cm. Though this idea—introduced sometime in the 1960s in Austrailia to combat the aforementioned stupidity—seems to be level-headed and fair, it has not gained wide acceptance beyond ski boots for no good reason. Luckily there exisits a carefully guarded formula, handed down by generations of ski shop employees, to convert a Monopoint size into the corresponding and more familiar US size: Simply add the first and second digit together, and then add the decimal point (finally add 1 to that result to convert a US Men’s size to a Women’s).
Mondo 29.0 2+9+.0 = 11 Men’s 11
Mondo 26.5 2+6+.5 = 8.5 Men’s 8.5 +1 = Wms’s 9.5
If you get to size 30 though, it all falls apart unless you alter your formula by adding 9 to the result:
Mondo 31.5 (3+1+.5)+9 Men’s 13.5
Nordic ski boots are typically sized through the European system, because after all, nordic skiing originated somewhere over there and most all of the equipment is manufactured outside of North America. No handy conversions here, because it is also based on King Richard II’s folly and fancy.
What can you do to help? Support your local metric foundation. Weigh yourself in kilograms and ask for cheese at the deli in 2mm slices. Come up with a metric way to keep time. And don’t use American allen wrenches on bicycle bolts unless you want to strip them out.
Alpine Skiing
What’s so great about all these new-fangled shorter “shaped” skis?
The Shaped-Ski Manifesto
Unless you ski in stonewashed jeans with a tapered leg and a New England Patriots jacket (and maybe even a blaze-orange hat if it’s below zero) and the year is 1985, you’ve no doubt been introduced to parabolic/shaped/super-sidecut skis. They seem to be endowed with wide tips, narrow middles and wide tails when compared with your old “straight” downhill planks. The dramatic hourglass shape of today’s skis make it much easier to carve turns at lower speeds; tip them on edge and it feels like they do the rest of the work. Though they still give the same thigh-burning workout, now you’ll be making tighter, more controlled turns between first tracks and apres ski.
Origins of Shaped Skis
Before the mid-90s, long skis, straightish skis with minimal sidecut were the norm. Through the previous hundred years, ski construction materials had matured (from hand-hewn wood to modern fiberglass/wood/foam hybrids), but the overall shape or sidecut of the skis was still virtually unchanged. In 1990-91, Elan introduced the first super-sidecut prototypes to the world, intially as learning tools for the beginning skier. Shaped skis quickly caught on with skiers of all ability levels and began to dominate the marked in ’94 and ’95. Today just about every ski is “shaped”, meaning they possess a dramatic sidecut.
Transitioning from Straight Skis to Shaped Skis
Straight skis tend to make long, sweeping turns because of their shape. To get them to make tighter carves, they require lots of forward pressure from the skier. Most straight-ski devotees tend to skid their skis around instead of actually carving with them for this reason. You’ll notice a dramatic difference when you strap on a pair of today’s shaped skis. Carves are easily done at any speed simply by putting the ski on edge; you’ll be making more condfident and satisfying turns in all conditions almost immediately with a greater degree of control. Most people feel like they quickly jump up to a higher ability level when making the transition from straight to shaped.
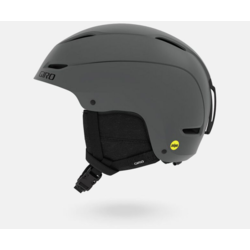
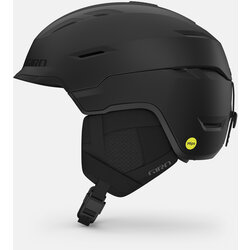
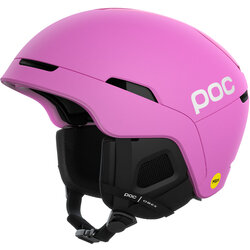
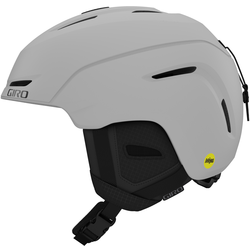
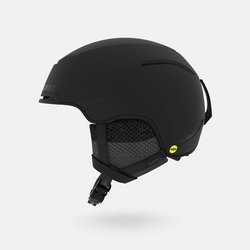
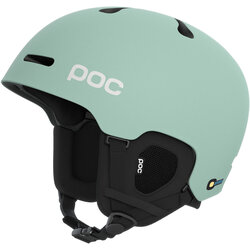
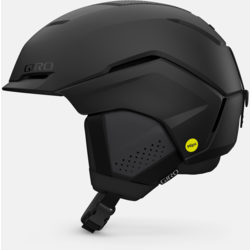
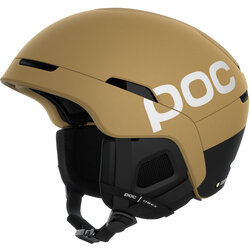
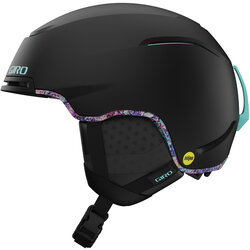
Are helmets necessary?
In our opinion, absolutely. Gliding down mountain slopes at high speeds can be dangerous, and gravity is often a harsh mistress. A helmet minimizes risk. If you drive with a seatbelt you should be biking and skiing with the equivilent. Today’s helmets are lightweight, comfortable, come with adjustable ventalation and they ward off tree branches a whole lot better than an itchy wool hat.
How do I fit Alpine ski boots?
Though you may spend countless autumn evenings agonizing over a millimeter ski-waist decision, make sure you spend most of your time in our store getting boots that fit properly. Boots are by far the most important aspect of a ski package. Granted, our wall of plastic boots may not be the most interesting thing to look at, but ill-fitting boots will send you red-eyed and stuffy-nosed into the main lodge faster than you can say “I should’ve tried these on in the store…” So ponder the meaning behind the multitudinous cascades of displayed boots, marvel at how the buckles gleam in the light, and relish the time spent clomping around the store in a couple of pairs. Take advantage of our boot-fitting expertise. Your feet will thank you.
Selection:
Unless you know exactly what you are looking for, your boot-fitter will ask you several questions to discover what your ability level is, your preferred terrain and the skis you’re on or the ones you plan to purchase. Beginner boots, like beginner skis, are soft-flexing. This makes them forgiving to mistakes and developing technique. An advanced skier who attacks the groomers would be recommended boots with a stiff lateral flex, which makes the skis more responsive and turns more precise, especially at high speeds where the effect is amplified. We will generally select two similar models from different manufacturers that match your ability, and allow you to pick between. A Salomon with a mondo-point size of 28.5 will fit quite differently than the same size from Atomic. Choose the one that fits the best, irrespective of aesthetics.
Fitting:
Bring your ski socks with you to the store (we’ve got plenty of try-ons if you forget). Unless you have extremely poor circulation, we recommend sizing your boots while wearing a light or medium weight synthetic sock. Alpine boots are well-insulated and a bulky sock can lead to an imprecise fit; it can also actually make you colder by compressing your foot and slowing blood flow. If you are planning on wearing footbeds or orthotics, please bring them with you because they can dramatically alter the boot fit.
Your fitter will check the size of both your feet, then narrow down the boot choices based on foot width, your ability, preferred terrain and budget. Next we’ll make sure the boot shell (minus the inner liner) is adaquet for the length of your foot. Ski boot liners “pack out” after being skied in; the liner material compresses and your left with an effectively larger boot than what you started with in the store. Finally we’ll buckle the boots and do a couple of tests to make sure the boots are the best fit for you.
Spend at least 10 to 15 minutes walking around with the boots on; if you breeze through the fitting you’ll have no chance of detecting any possible uncomfortable spots before they set upon you at the slope. You’ll be out there with a great-fitting pair of boots soon enough.
Footbeds:
We carry reinforced replacement footbeds by Superfeet and advocate for their use in almost all of the boots we sell. Whether or not they are right for you depends on the fit of the boots in question, the shape and integrity of your arch and any history of foot problems you may have. By supporting the arch, these aftermarket insoles allow all of your energy to be transmitted directly through the boot to the ski. The lag time between weight application, pronation (the natural collapse of the arch) and finally response from your ski is eliminated. This is a good thing for any skier. Your heel and forefoot should not slip in a properly-fitted pair of ski boots, and footbeds can often correct fit issues if you are between sizes in a boot you’ve taken a liking to in addition to improving the fit of a boot that is the correct size. We have a bin of pre-trimmed try-ons, so we can allow you to feel the difference.
I think my skis need a tune-up—–how do I know and what does it involve?
There are several common reasons your equipment might ask you to schedule them for a tune-up:
- It’s the beginning of the ski season and you want your skis revitalized
- Your skis feel sticky and slower than normal or you have dried-out bases (often characterized by numerous white streaks on the P-Tex base material)
- You have rust, dings or burrs, or generally dull metal edges; the skis do not hold an edge well or are behaving unpredictably
- You skied over a bunch of rocks and your bases are scraped up or gouged
A Full Tune-Up includes:
Base Repair*: Any nicks, gouges or core shots are filled with P-Tex, the same polyethylene material that the base is constructed out of. The excess P-Tex is then removed, and the board or skis are ready for flattening.
Flattening: The entire base (including the edges) is sanded. This removes material evenly from tip to tail and from edge to edge, exposing a clean running surface.
Stonegrinding: During this process, minute diamond-shaped or linear grooves are ground into the base. In addition to allowing the base to hold more wax, stoneground patterns are the best way to break the suction and friction between the base and the snow. By grinding this light pattern into the base, you’ll find that your board or ski will slide more easily and will be smoother in transition from edge to edge.
Beveling: The base and side edges are then sharpened and tuned to your liking. Depending on what you’re looking for in performance, the edges are beveled from 0 to 3 degrees. The edges are then polished using a soft stone or emery cloth.
De-tuning: De-tuning is the dulling of your board or ski just ahead of and behind the running surface. This is to aid in transition and turning to prevent catching the tip and tail.
Waxing: The last process in any tune-up is hot waxing. Hot waxing impregnates the base, providing protection from damage and increasing gliding and turning characteristics. We run the skis over a waxing belt saturated with universal glide wax. You can upgrade to one of the to the iron-in a custom wax of your choosing by hand. This will get a bunch more wax deep into the base so it will last a lot longer and glide faster.
*only performed as necessary. Minor repairs included in basic Tune-Up price; additional labor fees apply to deeper gouges, starting at $5.00.
Alpine Skiing
What’s so great about all these new-fangled shorter “shaped” skis?
The Shaped-Ski Manifesto
Unless you ski in stonewashed jeans with a tapered leg and a New England Patriots jacket (and maybe even a blaze-orange hat if it’s below zero) and the year is 1985, you’ve no doubt been introduced to parabolic/shaped/super-sidecut skis. They seem to be endowed with wide tips, narrow middles and wide tails when compared with your old “straight” downhill planks. The dramatic hourglass shape of today’s skis make it much easier to carve turns at lower speeds; tip them on edge and it feels like they do the rest of the work. Though they still give the same thigh-burning workout, now you’ll be making tighter, more controlled turns between first tracks and apres ski.
Origins of Shaped Skis
Before the mid-90s, long skis, straightish skis with minimal sidecut were the norm. Through the previous hundred years, ski construction materials had matured (from hand-hewn wood to modern fiberglass/wood/foam hybrids), but the overall shape or sidecut of the skis was still virtually unchanged. In 1990-91, Elan introduced the first super-sidecut prototypes to the world, intially as learning tools for the beginning skier. Shaped skis quickly caught on with skiers of all ability levels and began to dominate the marked in ’94 and ’95. Today just about every ski is “shaped”, meaning they possess a dramatic sidecut.
Transitioning from Straight Skis to Shaped Skis
Straight skis tend to make long, sweeping turns because of their shape. To get them to make tighter carves, they require lots of forward pressure from the skier. Most straight-ski devotees tend to skid their skis around instead of actually carving with them for this reason. You’ll notice a dramatic difference when you strap on a pair of today’s shaped skis. Carves are easily done at any speed simply by putting the ski on edge; you’ll be making more condfident and satisfying turns in all conditions almost immediately with a greater degree of control. Most people feel like they quickly jump up to a higher ability level when making the transition from straight to shaped.
Are helmets necessary?
In our opinion, absolutely. Gliding down mountain slopes at high speeds can be dangerous, and gravity is often a harsh mistress. A helmet minimizes risk. If you drive with a seatbelt you should be biking and skiing with the equivilent. Today’s helmets are lightweight, comfortable, come with adjustable ventalation and they ward off tree branches a whole lot better than an itchy wool hat.
How do I fit Alpine ski boots?
Though you may spend countless autumn evenings agonizing over a millimeter ski-waist decision, make sure you spend most of your time in our store getting boots that fit properly. Boots are by far the most important aspect of a ski package. Granted, our wall of plastic boots may not be the most interesting thing to look at, but ill-fitting boots will send you red-eyed and stuffy-nosed into the main lodge faster than you can say “I should’ve tried these on in the store…” So ponder the meaning behind the multitudinous cascades of displayed boots, marvel at how the buckles gleam in the light, and relish the time spent clomping around the store in a couple of pairs. Take advantage of our boot-fitting expertise. Your feet will thank you.
Selection:
Unless you know exactly what you are looking for, your boot-fitter will ask you several questions to discover what your ability level is, your preferred terrain and the skis you’re on or the ones you plan to purchase. Beginner boots, like beginner skis, are soft-flexing. This makes them forgiving to mistakes and developing technique. An advanced skier who attacks the groomers would be recommended boots with a stiff lateral flex, which makes the skis more responsive and turns more precise, especially at high speeds where the effect is amplified. We will generally select two similar models from different manufacturers that match your ability, and allow you to pick between. A Salomon with a mondo-point size of 28.5 will fit quite differently than the same size from Atomic. Choose the one that fits the best, irrespective of aesthetics.
Fitting:
Bring your ski socks with you to the store (we’ve got plenty of try-ons if you forget). Unless you have extremely poor circulation, we recommend sizing your boots while wearing a light or medium weight synthetic sock. Alpine boots are well-insulated and a bulky sock can lead to an imprecise fit; it can also actually make you colder by compressing your foot and slowing blood flow. If you are planning on wearing footbeds or orthotics, please bring them with you because they can dramatically alter the boot fit.
Your fitter will check the size of both your feet, then narrow down the boot choices based on foot width, your ability, preferred terrain and budget. Next we’ll make sure the boot shell (minus the inner liner) is adaquet for the length of your foot. Ski boot liners “pack out” after being skied in; the liner material compresses and your left with an effectively larger boot than what you started with in the store. Finally we’ll buckle the boots and do a couple of tests to make sure the boots are the best fit for you.
Spend at least 10 to 15 minutes walking around with the boots on; if you breeze through the fitting you’ll have no chance of detecting any possible uncomfortable spots before they set upon you at the slope. You’ll be out there with a great-fitting pair of boots soon enough.
Footbeds:
We carry reinforced replacement footbeds by Superfeet and advocate for their use in almost all of the boots we sell. Whether or not they are right for you depends on the fit of the boots in question, the shape and integrity of your arch and any history of foot problems you may have. By supporting the arch, these aftermarket insoles allow all of your energy to be transmitted directly through the boot to the ski. The lag time between weight application, pronation (the natural collapse of the arch) and finally response from your ski is eliminated. This is a good thing for any skier. Your heel and forefoot should not slip in a properly-fitted pair of ski boots, and footbeds can often correct fit issues if you are between sizes in a boot you’ve taken a liking to in addition to improving the fit of a boot that is the correct size. We have a bin of pre-trimmed try-ons, so we can allow you to feel the difference.
I think my skis need a tune-up—–how do I know and what does it involve?
There are several common reasons your equipment might ask you to schedule them for a tune-up:
- It’s the beginning of the ski season and you want your skis revitalized
- Your skis feel sticky and slower than normal or you have dried-out bases (often characterized by numerous white streaks on the P-Tex base material)
- You have rust, dings or burrs, or generally dull metal edges; the skis do not hold an edge well or are behaving unpredictably
- You skied over a bunch of rocks and your bases are scraped up or gouged
A Full Tune-Up includes:
Base Repair*: Any nicks, gouges or core shots are filled with P-Tex, the same polyethylene material that the base is constructed out of. The excess P-Tex is then removed, and the board or skis are ready for flattening.
Flattening: The entire base (including the edges) is sanded. This removes material evenly from tip to tail and from edge to edge, exposing a clean running surface.
Stonegrinding: During this process, minute diamond-shaped or linear grooves are ground into the base. In addition to allowing the base to hold more wax, stoneground patterns are the best way to break the suction and friction between the base and the snow. By grinding this light pattern into the base, you’ll find that your board or ski will slide more easily and will be smoother in transition from edge to edge.
Beveling: The base and side edges are then sharpened and tuned to your liking. Depending on what you’re looking for in performance, the edges are beveled from 0 to 3 degrees. The edges are then polished using a soft stone or emery cloth.
De-tuning: De-tuning is the dulling of your board or ski just ahead of and behind the running surface. This is to aid in transition and turning to prevent catching the tip and tail.
Waxing: The last process in any tune-up is hot waxing. Hot waxing impregnates the base, providing protection from damage and increasing gliding and turning characteristics. We run the skis over a waxing belt saturated with universal glide wax. You can upgrade to one of the to the iron-in a custom wax of your choosing by hand. This will get a bunch more wax deep into the base so it will last a lot longer and glide faster.
*only performed as necessary. Minor repairs included in basic Tune-Up price; additional labor fees apply to deeper gouges, starting at $5.00.
Nordic (Cross-Country) Skiing
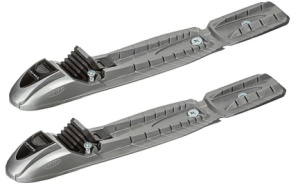
My old bindings had three pins; are today’s bindings better? What is available?
In a word, yes. But you knew we were going to say that. First, an appropriate adage: “The good thing about standards is that we have so many of them.” Let’s take a quick look at bindings both modern and past:
75mm Nordic Norm: The original cross-country bindings and the old Nordic Norm. A 75mm duckbilled sole interfaces with three pins on the binding plate and is clamped in place by a bail. This is the most common type of binding to find on skis that are older than 1990. The thickness of the sole is much less than that of the new 75mm backcountry standard, but Alpina Sports continues to make one compatible boot for those who don’t want to give up beloved skis. This system has been almost entirely replaced by the New Nordic Norm or Salomon Nordic System boot/binding configurations.
75mm NN Backcountry: The same interface and 3-pin system as above but with a thicker, sturdier sole. These bindings are used today not for casusal touring but for downhill performance and stability on backcountry nordic and telemark skis. High-cuffed synthetic, natural leather or plastic telemark boots are most commonly paired with the system. Telemark skis have been using this system for a long time, but have since switched to cable and plate bindings (see below). These 75mm bindings are commonly paired with the heavier-duty Rugged Touring skis for optimum downhill turning performance.
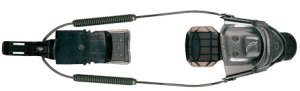
Cable Bindings: These have become the norm for today’s Telemark skiers. Spring-loaded cartridges attached to a cable pull the boot forward snugly into the toe-piece; though the boots still use the 75mm sole, the cable makes the three pin system unnecessary for boot retention. The cable system affords Tele skiers more control and power (read: easier turns) on increasingly wider skis.
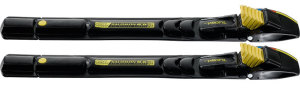
The following bindings are often called “system bindings” and they have three distinct advantages over traditional 3-pin systems when it comes to touring performance. System bindings have a free pivot. This reduces the resistance to touring that is found in 75mm in which the user is required to flex the entire sole and makes for more enjoyable striding and gliding. They also have ridges that interface with the boot sole, offering excellent stability when both heels are resting on the bindings (as in a descent). Lastly, they are much easier to get in and out of. Point your toe and step in to the auto-entry versions until it clicks. Press the release button with a ski pole to disengage. Both systems are offered in manual entry models as well, which provides a more positive engagement and may be appropriate for usage where more stability is desired.
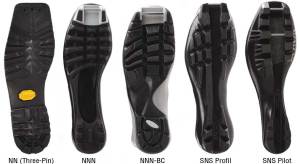
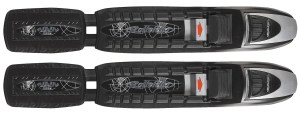
New Nordic Norm: Developed in 1985 by a company called Rottefella, this system utilizes a single rod mounted horizontally in the boot sole behind the toes and two narrow ridges running parallel along the binding plate. There are actually (sigh) two verisons of the NNN system, but luckily NNN I is almost entirely obsolete. Boots from NNN I had the rod mounted out in front of the toes, but Rottefella updated the system in 1990 as the current New Nordic Norm II with a more natural pivot point and a more prominent ridge interface with the boot heel. Naturally there are compatibility problems between these two systems. All present-day boots using the NNN (or “triple N”) system are using version II.
Salomon Nordic System: Salomon’s proprietary design and incompatible with the NNN system. Very similar to the above except the rod is a little further out in front of the toe and the binding heel plates have one wide ridge instead of two narrow ones. Salomon and Fischer make SNS-compatible boots.
Salomon SNS-Pilot: A skating-specific binding design. Compatible boot soles have an additional pin (for a total of two!) under the toe that interfaces with a return spring on the binding. Since the ski remains closer to your foot, you have better power transmission during the kick phase and more control while gliding.
SNS-BC: Both Salomon and Rottefella produce bindings that accept bigger and stiffer backcountry-oriented boots with thicker rods in the sole for better downhill control without compromising kick and glide. The bindings also feature thicker, more prominent ridges and wider binding plates. Traditional NNN or SNS boots will not fit into these bindings; only boots with the NNN-BC or SNS-BC sole are compatible. These are best matched with wider nordic skis designed for out-of-track skiing and exploring, where ease of touring is emphasized over downhill performance.

NNN-BC,
How do you size classical and skate skis?
Gone are the days where you’d stick your arm straight up and choose a length that is closest to your bent wrist, and if someone insists that this is *still* how it is done, run away. Much the same thing that happened to alpine skis is happening in Nordicdom as well. Skis have for the most part grown shorter. Leaving the bent wrist method behind, today we size nordic skis primarily based on weight, modified by intended usage and ability level. Manufacturers provide us with this technical information on all of our skis, including weight ranges for each specific model length and stiffness. Rest assured that we know how to size you.
It is body weight that compresses the kick zone of a classic ski. And in a given model, greater the length, the more camber the ski possesses. If a ski is sized too short, most of the kick zone will be touching the snow (causing lots of drag) during the glide phase because the camber is meant to support a lighter skier. Too long a ski will be difficult to compress, have a shorter effective kick zone and will not provide enough climbing grip. Remember that there is wide variation among classical and skate skis, and one model may reach well above your head while another may hit you in the chin. Higher performing race skis come in several closely spaced sizes and flexs so they can be custom-selected for ability and snow conditions. With more casual touring skis, so many options are not needed.
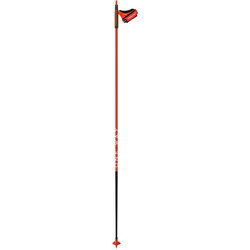
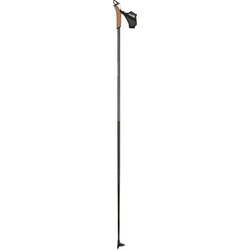
Poles are much more straightforward. For classic poles, size them to your armpit; intermediate or advanced skiers may prefer a little longer for more pole power. Skating poles need to be longer to properly assist the skating motion. Roughly between the chin and the lower lip is the right size.
Waxable or waxless…what is the difference? Do they both need wax?
You can tell the difference between these two categories of skis by simply turning them over and exmaining the bases. Waxable skis are entirely smooth from tip to tail, while waxless versions have an obivous pattern along the middle third of the base length. The difference lies in how each type achieves grip.
A waxable ski requires the frequent application of special nordic kick wax to that middle third zone, selected by examining the snow condition and temperature of the day. Chosen properly, the kick wax will bind to the snow when the ski is weighted for excellent grip but release and slide smoothly during the glide phase. Waxable skis will always provide better overall performance—better grip that translates to a more powerful glide—than comparable waxless models with the understanding that they require a bit more effort to care for. Please note that there is nothing scary about waxing and wax selection, it’s just a step that some folks choose to leave out.
Waxless skis grip the snow like the tread of a boot, deforming the crystals and creating a stable platform to push off from. Every company has their own pattern, but most bear some resemblence in form to snake skin, designed to slide forward but not back. Since it is this pattern that provides grip, kick wax is not used on waxless skis. This makes them easier to maintain; if there’s snow, just step in to the bindings and go. The choice between the two is entirely dependent on your own preferences and nordic skiing goals. Little tidbit: There is no such thing as a “waxless” skate ski; skate skis have glide zones along their full length.
A helpful analogy is to equate waxable skis with standard automobile transmissions, which allow the driver to select the gear and compare waxless skis to automatics, where shift-and-forget convienence comes at the price of lower gas mileage.
Though waxless skis do not need kick wax, all skis need to be glide waxed.Alpine skis and snowboards need glide wax, but it’s even more important for nordic skis because gravity is not always on your side. The waxless designation only refers to the freedom from applying kick wax. The easiset solution is to purchase liquid glide wax and simply rub it in every 20 miles or so. Check out the next section for more specific waxing information or come visit us at the shop for wax recommendations and technique.
How do I fit Nordic ski boots?
Selection:
Boots have a powerful effect on how a ski behaves. Your boot selection can enhance the particular characteristics of your chosen ski. Because there are several incompatible binding systems, the interface on your boot sole will direct the available binding choices. Remember that if you happen to be purchasing Fischer skis, this does not mean you should look only at Fischer boots. We often carry several versions of the same boot by different companies, and we suggest you purchase the boots that are the best-fitting without regard to aesthetics.Check here for information on the different types of Nordic boots.
Fitting:
Nordic boots are measured in European sizes (like cycling shoes), and we will check the length of both your feet before you try anything on. Unless you have extremely poor circulation, we recommend sizing your boots while wearing a thin, lightweight synthetic sock. Nordic boots are very well insulated, and because Nordic skiing is aerobic, your feet stay warmer than they would while alpine skiing. Thick socks interfere with the boot fit and in many cases actually make your feet colder, compressing the foot and reducing blood flow. Bring the socks you’ll be wearing to the store, or borrow a pair from us if you forget. If you plan on using custom orthodics in your boots or have favorite footbeds, bring those as well.
Footbeds:
We carry reinforced replacement footbeds by Superfeet and advocate for their use in almost all of the boots we sell. Whether or not they are right for you depends on the fit of the boots in question, the shape and integrity of your arch and any history of foot problems you may have. By supporting the arch, these aftermarket insoles allow all of your energy to be transmitted directly through the boot to the ski. The lag time between weight application, pronation (the natural collapse of the arch) and finally response from your ski is eliminated. This is a good thing for any skier. Your heel and forefoot should not slip in a properly-fitted pair of ski boots, and footbeds can often correct fit issues if you are between sizes in a boot you’ve taken a liking to in addition to improving the fit of a boot that is the correct size. We have a bin of pre-trimmed try-ons, so we can allow you to feel the difference.
Do I need nordic skis with metal edges?
Skiers who spend most of their time on flat or rolling terrain definitely do not need them. The metal digs into hard snow and ice only when the ski is tilted on edge, which occurs naturally when excuting a turn or while side-stepping or using the herring bone technique to ascend steep sections. Certain light and most rugged touring skis possess metal edges, because benefit outweighs cost (read: steel edges add weight and they require periodic maintenance) in the terrain that these skis frequent. When stepping down, over and back up an exposed streambed on an ungroomed trail, metal edges make the task easier. Anyone interested in carving turns or descending steeper trails is likely interested in a ski with metal edges because of the control afforded. Considering the terrain you’re apt to ski will often make this decision for you.
Which Nordic binding system is better, NNN or SNS?
A fine question, to be sure. But first, another question: Which bird tastes better, chicken or turkey? Wait. Don’t answer. It was a rhetorical question. It’s okay if you’re a vegetarian or a vegan. The point is that both chicken and turkey taste good. Well, that wasn’t the point. Hmmm.
To answer the hypothetical question you just sort of posed above:
Both the New Nordic Norm and the Salomon Nordic System (NNN and SNS) bindings work equally well. The mechanics of both are nearly identical, so it shouldn’t really be that much of a surprise.
So how do you choose between them? Let your boots decide. Try on boots with similar features from different manufacturers and see which one fits your foot most comfortably. Then select the binding system (SNS or NNN) that interfaces with the chosen boot. If you are building a Nordic ski package, the boots should determine the binding system, not the other way around.
What is the difference between Skate, Classic and Combi Nordic boots?
SKATE BOOTS The boot designed for skating has a very rigid upper cuff built up with thick plastic to support the foot and ankle. Skaters push off with their inner ski edges in a powerful motion similar to rollerblading, and lower-cut boots leave the foot, ankle and associated muscles twisting in the wind. The plastic sole material on a skate boot is dramatically stiffer than its classical counterpart, which works to stabilize the foot and keep the ski close to the heel. If you are in disbelief, first flex a classic and then a skate sole with your hands. Rigidity is the name of the game with skating equipment. Because of this, classic skiing with skate boots is not recommended; you’ll be waddling along in a mock-worthy frankengait because the boot soles do not flex enough for a comfortable kick and glide experience. The more expensive the skate boot, the lighter and stiffer it usually becomes.
Full-on skate boots are not for everybody, however; take a look at what combi boots have to offer before making your decision.
COMBI BOOTS The word “combi” refers to the boot’s winningest trait: A two for the price of one combo. You can use a single pair of combi boots with your skate skis and your classic skis with excellent results. Combi boots possess a fairly stiff upper cuff (though not as stiff as a skate boot) which makes for great skating performance. The sole is necessarily less rigid than a skate boot, however, so the boots flex naturally at your toes for the kick and glide of classical skiing.
Believe it or not, most classical-only skiers benefit from the upper cuff provided by combi boots. The added stability gives confidence on uneven tracks or while flying downhill. Overuse injuries can be prevented because the ligaments surrounding the supported ankle are not required to do as much work. In practice, the upper cuff does not impede the classical skiing motion either. For these reasons we recommend combi boots for all classic track skis. Not all combi boots are created equal; some may be better suited to skating and some to classic, based on the stiffness of the cuff and sole.
Recreational skaters may also opt for a combi boot as a less expensive (in some cases) alternative to full skate boots.
CLASSIC BOOTS The feature that defines a classic boot is typically the softer, more flexible plastic sole for unimpeded striding and gliding. Racing boots often do away with any type of cuff to save weight and allow complete and total freedom of movement, but this places all the burden of staying balanced on the shoulders of the skier. As with any product designed for racing, they are not meant for the masses.
The more popular and user-friendly classic boots are built with some type of ankle support, which is usually in the skier’s best interest. The Light Touring boots on the left have plenty of support for skiing through fields, on the local golf couse, or places with informal ski trails but no actual grooming (we loosely define this as, you guessed it, “Light Touring.”) They are also great for trails at the local x/c resort.
The two backcountry boots (the NNN-BC and the 3-pin) are designed out of stiff materials to provide stability and confidence while skiing in the backcountry through deeper ungroomed snow. This most often includes touring on hiking / biking trails or backcountry ski trails that feature steeper descents, off-camber trails and devious natural obstacles of rock and stump. We call this Rugged Touring. All things being equal, the NNN-BC boots often kick & glide better because the boot pivots on a thick pin; conversely, the actual sole of a 3-pin boot must flex during touring which adds to the fatigue factor a little bit. 3-pin boots have a more secure binding connection, however, and because of this offer more power and lateral support while making a telemark or a parallel turn. Each has their advantages, and one is typically the obvious choice given the goals of the particular skier or the chosen ski.
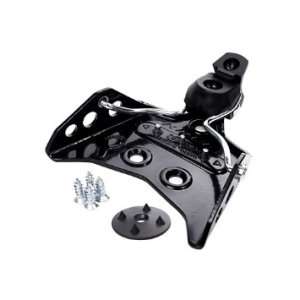
Telemark Skiing / Alpine Touring
How do I select climbing skins?
So you want to buy climbing skins, do ya? They’re plush and fun, and they make exploring the backcountry possible without having to shoulder your skis and slog. Modern climbing skins are typically made out of nylon and are held onto the base of the ski by a combination of extremely sticky glue and one or more buckle/clip devices. The following is a brief overview of the different types along with sizing guidelines. We stock Black Diamond skins at Omer & Bob’s.
SHAPED SKINS
Description: Climbing skins come in multiple widths, from about 55mm to 130mm, assuring an excellent fit on any ski. You simply trim the skin (with the provided tool) to match the particular sidecut of your skis, leaving the edges exposed for grip side-hilling or skidding. Using shaped skins provides the most tenacious climbing grip because that purple plush covers so much surface area. If your skis have a difference between tip and waist greater than 25mm (which includes almost all modern Telemark/Alpine Touring boards), then sizing your skins so that they can be trimmed to sidecut is the best choice.
Sizing: Select shaped skins based on your ski’s width at the tip; pick the closest skin width below that. If the tip dimension is 118mm, then you need 110mm skins. The most secure connection is through a system, like the Black Diamond Clipfix, that provides attachments at the tip and the tail
STRAIGHT SKINS
Description: The other skin option. Using straight skins will save you from having to do any trimming, plus they’ll be lighter and your skis will glide a little bit better. The downside is you get less grip with straight skins because they don’t cover as much base area. The lack of grip is most telling when traversing, because only an inch or so of your skis are in contact with the slope at one time; with straight skins, more of that inch is uncovered by the climbing plush. If your skis have a lesser sidecut, or you’re using Rugged Touring gear for your backcountry exploration (where shaped skins can potentially be overkill), straighties are the way to go.
Sizing: Pick the skins based on ski width at the waist. A ski that is 64mm at the waist should wear 60mm skins. Often skier that choose to use straight skins will opt for a system that only has a tip attachment for ease of use.
KICKER SKINS
Description: Short versions of the above, meant to be worn under the foot or in the wax pocket of Nordic or Telemark/AT skis. You’ll achieve great glide with the smaller, lighter set-up. Kicker skins are best for rolling or low-angle slopes or doing short downhill/uphill laps; don’t expect to ascend mountains with them (unless you have a zeal for the herringbone or simply love to curse). Rugged or Light Touring Nordic gear match up well with these skins. Nordic skiers will sometimes use them in klister’s stead to get grip on frozen tracks.
Sizing: Same as straight skins. Kicker skins are held in place by a strap over the ski and glue adhesive. Can be used on skis with waxless patterns.
What about using kick wax on telemark skis for touring?
Here is where backcountry telemarkers delve briefly into the arcane nordic art of waxing for kick. Many of us have never entertained this option because we are, for reasons unknown, firmly attached to the hand-numbing rituals of climbing skins. If you’ve ever been easily passed by nordic skiers as you grunt and shuffle your way over a long, rolling approach, then waxing for kick could be your new favorite thing.
The basic principles and techniques are the same as nordic kick waxing, so examine that section for further technical insight. In this case, don’t attempt to create an artificial “kick zone” by rubbing wax only underneath the ski bindings; there’s no kick zone on a single-cambered ski. If you attempt to autocratically impose one, your skis will probably reward you with a well-deserved face plant or two. Instead crayon the wax along the entire length of the base, from tip to tail. This is the best way you’ll get the grip you need to make it worthwhile, but feel free to experiment. Bring along a plastic scraper and perhaps even some base cleaner to get the stuff off when you need to. You’ll find that you glide farther and faster than your skin-shod buddies and can manage nice turns on downhill pitches where climbing skins tend to hang up. When you get to the steep stuff, just slap the skins right over the wax if you want (or you can scrape and clean if you’ll no longer need it). Though this technique will not have you gleefully crusing around the local golf course in a full-body spandex suit, it will certainly open up possiblities for day-trips you may have shied away from when climbing skins were the end-all-be-all.
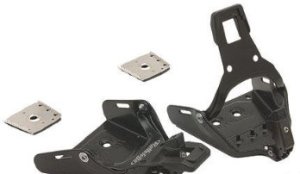
What is the difference between standard Alpine Skis and Alpine Touring Skis?
There are in fact several important differences between these two closely related species of skis:
AT skis are lighter. Obviously, the “touring” component in Alpine Touring is a large chunk of the experience, so light skis are infinitely more pleasant to cruise uphill with. Most standard-issue Alpine skis are designed for usage on hardpack at the ski resort, so they are loaded down with damping materials to reduce vibration and permit better edgehold on compacted snow. The AT aficionado is primarily on the many forms of soft natural snow in the backcountry, where high-speed gate-bashing edgehold is not necessary.
AT skis are softer-flexing. In powder, softer skis are in their element. They float readily and flex easily through turns, where stiff skis sink like boat anchors. AT skis are designed this way for optimal performance in natural snow. They also posses rounder, more even flex patterns; this means that the flex is the same at the tip, underfoot and tail of the ski. Many Alpine skis have stiffer tails to dynamically pop the skier out of a turn and into the next. This is can be a desirable characteristic on the predictable machine-groomed resort slopes, but as much on the windslabbed, sunbaked, snowdrifted mess that is found on the average backcountry tour.
AT skis cost less money. As mentioned above, they are not loaded down with the technology of their Alpine cousins and you end up saving money because of this.
How do I fit Telemark ski boots?
Selection:
The easiest way to choose the proper Tele boot is to consider where and how you’re going to ski. A skier who descends low-angled backcountry slopes may demand a different boot from one who’ll be carving on the steeps at a resort. See the following section for particular boot categories and then come in for some advice from our staff backcountry aficionados.
Note to AT Skiers: As of the 06-07 winter season, we do not stock AT-specific boots. The AT bindings we sell are compatible with both standard-issue downhill ski boots and their lighter weight AT-specific cousins.
Fitting:
Bring your ski socks with you to the store. Unless you have extremely poor circulation, we recommend sizing your boots while wearing a thin, lightweight synthetic sock. Telemark boots are well-insulated and a bulky sock can lead to an imprecise fit; it can also actually make you colder by compressing your foot and slowing blood flow. If you are planning on wearing custom footbeds, please bring them with you because they can dramatically alter the boot fit. Spend at least 10 to 15 minutes walking around with the boots on, dropping into various Tele stances; if you breeze through the fitting you’ll have no chance of detecting the uncomfortable spots before they set upon you at the slope. All the Tele boots we stock have excellent heat-moldable liners that really conform to your foot and ankle shape. It takes a boot-heating machine to get them to the proper temperature without burning and we perform this service for free if you purchase boots from us (it takes 30 – 40 minutes total).
Footbeds:
We carry reinforced replacement footbeds by Superfeet and advocate for their use in almost all of the boots we sell. Whether or not they are right for you depends on the fit of the boots in question, the shape and integrity of your arch and any history of foot problems you may have. By supporting the arch, these aftermarket insoles allow all of your energy to be transmitted directly through the boot to the ski. The lag time between weight application, pronation (the natural collapse of the arch) and finally response from your ski is eliminated. This is a good thing for any skier. Your heel and forefoot should not slip in a properly-fitted pair of ski boots, and footbeds can often correct fit issues if you are between sizes in a boot you’ve taken a liking to in addition to improving the fit of a boot that is the correct size. We have a bin of pre-trimmed try-ons, so we can allow you to feel the difference.
How are Telemark and AT skis different from Backcountry nordic skis?
Backcountry nordic skis have a waxless pattern (just a couple are designed for kick waxing) on the base for climbing and touring, and along with that comes some amount of double camber to keep the pattern off the snow for some increased glide. Modern telemark and AT skis are built the same as alpine skis (and can in fact be used interchangeably given the correct performance criteria) so they cannot do any kick and glide without installing climbing skins.
Climbing skins can be used to climb much steeper pitches than a waxless pattern ski but have very little glide relative to a waxless pattern ski. Therefore Backcountry skis are used more on mellower rolling pitchs and/or shorter climbs and Tele/AT skis are used used for the long steep ascents where you can take the skins off at the top for the decent.
Other notes for consideration: 1) The nordic skis with a fair bit of double camber will not turn as well as those with a very soft double camber 2) The in between possibility is to use a kicker skin (just under the middle portion of the ski) on a nordic ski to give it more climbing range 3) The widest BC skis are about as beefy as the narrowest tele skis so there is some overlap in downhill capability.
Gear Up for the Slopes
Refresh your essential snow gear while you're getting your skis or snowboard ready for the season. We have an excellent selection of helmets, goggles, and more from top brands. Shop online and pickup your items for free on your next shop visit.